Tips

Tips

How to Get Rid of Aphids on Houseplants: A Complete Guide

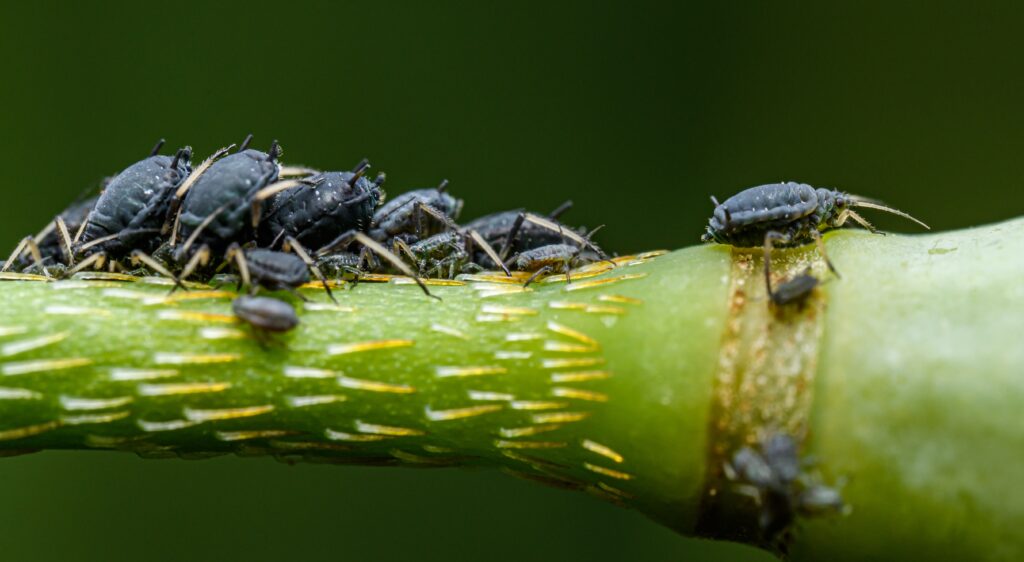
Care Guide How to Get Rid of Aphids on Houseplants: A Complete Guide Few things are more frustrating than discovering tiny insects covering the leaves of a healthy houseplant. Aphids are one of the most common pests found on indoor and outdoor plants, and while they multiply quickly, they’re also one of the easiest pests to eliminate when caught early. The key is acting quickly. A small colony can become hundreds of aphids in just a few weeks because many aphids reproduce without mating, allowing populations to grow rapidly. Fortunately, with consistent treatment and regular inspections, most infestations can be eliminated before they cause serious damage. What Are Aphids? Aphids are tiny, soft-bodied insects that feed by piercing plant tissue and sucking out sap. Most are about one to three millimeters long and may appear green, black, brown, yellow, white, gray, or even pink depending on the species. They often gather in clusters on new growth, flower buds, stems, and the undersides of leaves where plant tissue is soft and easier to feed on. How to Tell if Your Plant Has Aphids One of the easiest ways to spot aphids is by looking closely at new growth. Signs of an infestation include: Small insects clustered together. Curled or distorted new leaves. Sticky residue on leaves or nearby furniture, known as honeydew. Slow or distorted new growth. Black sooty mold growing on sticky honeydew. You may also notice ants. Ants are attracted to the sugary honeydew produced by aphids and sometimes protect aphid colonies from natural predators. Why Aphids Are Harmful A few aphids usually won’t kill a healthy houseplant. However, large populations continuously remove nutrients from the plant, weakening new growth and causing leaves to curl, twist, or become deformed. Some aphid species can also spread plant viruses, although this is more common in outdoor gardens than indoor collections. Isolate the Plant First As soon as you discover aphids, move the affected plant away from your other houseplants. Although aphids don’t spread as quickly as some pests like spider mites or thrips, they can still move between nearby plants, especially when winged adults develop. Keeping the plant isolated helps protect the rest of your collection while you begin treatment. Step One: Remove as Many Aphids as Possible Before reaching for insecticides, physically remove as many aphids as you can. A gentle stream of water from a sink sprayer or shower often removes a large percentage of the insects. For heavier infestations, you can also wipe leaves with a damp cloth or gently remove clusters by hand. Reducing the population before spraying makes later treatments much more effective. Treat with Insecticidal Soap One of the safest and most effective treatments for houseplants is insecticidal soap. Unlike systemic pesticides, insecticidal soap works by damaging the outer layer of soft-bodied insects. It must directly contact the aphids to be effective, so thorough coverage is important. Spray both the tops and undersides of every leaf, along with stems and growing tips where aphids like to hide. Always follow the product label and avoid spraying plants sitting in direct sunlight. Neem Oil Neem oil is another popular option for treating aphids. It works differently than insecticidal soap by interfering with feeding, development, and reproduction. Neem can be effective, but because it works more slowly, it often requires multiple applications. Many gardeners alternate between insecticidal soap and neem oil, although it’s generally best not to mix products together unless the manufacturer specifically recommends doing so. Repeat Treatments Many people spray once and assume the problem is solved. Unfortunately, that’s rarely enough. Small aphids or newly hatched insects can easily survive if they weren’t contacted during the first treatment. Most insecticidal soap products recommend repeating treatments every several days until no aphids remain. Always follow the directions on the label of the product you’re using. Continue inspecting the plant for at least two weeks after you believe the infestation is gone. Check Nearby Plants If one plant has aphids, inspect every nearby houseplant. Pay special attention to tender new growth where aphids prefer feeding. Catching a second infestation early is much easier than treating an entire collection later. Avoid Overfertilizing Fast-growing, nitrogen-rich new growth is especially attractive to aphids. Using excessive fertilizer can encourage the production of soft new leaves that aphids prefer. Feed your plants according to the fertilizer’s directions instead of assuming more fertilizer will produce healthier plants. Prevent Future Infestations While no plant collection is completely immune to pests, several habits greatly reduce the chances of future outbreaks. Inspect every new plant before bringing it home. Quarantine new plants for a week or two whenever possible. Regularly examine new leaves and stems. Keep plants healthy with proper watering and lighting. Treat small infestations immediately before they become large ones. When to Throw a Plant Away In most cases, there’s no reason to discard a plant simply because it has aphids. Even fairly heavy infestations can usually be controlled with repeated treatments and careful monitoring. However, if a plant is severely damaged, repeatedly reinfests the rest of your collection, or treatment has failed after many attempts, removing the plant may sometimes be the most practical decision. Fortunately, most indoor aphid infestations are much easier to eliminate than pests like thrips or spider mites. Final Thoughts Finding aphids on your favorite houseplant can be discouraging, but they’re one of the more manageable pests you’ll encounter. Early detection, isolation, physical removal, and consistent treatment with insecticidal soap or neem oil are usually enough to eliminate an infestation. The most important habit is making plant inspections part of your regular care routine. Spending a minute checking new leaves each week can help you catch pests before they become a serious problem. With patience and consistent care, your plants can recover quickly and continue producing healthy new growth.
Tips

Alocasia Care Guide: Everything You Need to Know to Grow Healthy Elephant Ear Plants

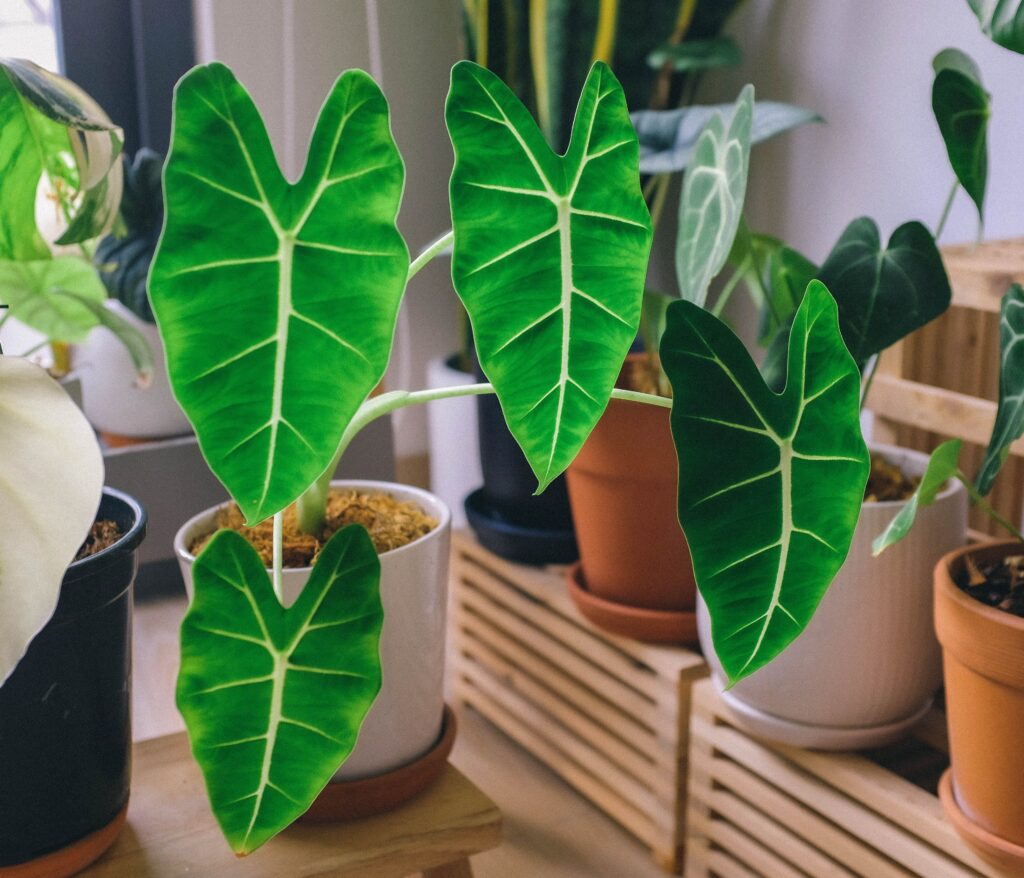
Care Guide Alocasia Care Guide: Everything You Need to Know to Grow Healthy Elephant Ear Plants Alocasias are some of the most striking houseplants you can grow. Their dramatic leaves, bold veins, and unique textures make them favorites among plant collectors. From the metallic shine of Silver Dragon to the velvety foliage of Frydek and the massive leaves of Regal Shield, there’s an Alocasia for nearly every plant lover. While Alocasias have a reputation for being difficult, they’re much easier to grow once you understand what they need. Most problems come from inconsistent watering, poor lighting, or low humidity rather than the plant being inherently difficult. With the right conditions, Alocasias can produce beautiful new leaves throughout the growing season and become stunning centerpieces in your home. Light Requirements Alocasias thrive in bright, indirect light. In their natural habitat, they grow beneath the canopy of tropical forests where they receive filtered sunlight throughout the day. Indoors, placing them near an east-facing window or a few feet back from a bright south- or west-facing window usually provides ideal lighting. Too little light often results in slower growth, smaller leaves, and leggy stems. Too much direct afternoon sun can scorch the leaves, especially on velvety varieties like Alocasia Frydek. If your Alocasia begins leaning toward the window, rotate the pot every week or two to encourage even growth. Watering Proper watering is the most important part of Alocasia care. Unlike succulents, Alocasias prefer consistently moist soil, but they should never sit in water. Allow the top inch or two of soil to dry before watering again. When you do water, soak the soil thoroughly until water drains from the bottom of the pot, then empty any excess water from the saucer. Avoid watering on a fixed schedule. Temperature, humidity, light levels, and pot size all affect how quickly the soil dries. Overwatering is one of the most common reasons Alocasias decline indoors. Humidity One reason Alocasias are considered challenging is their love of humidity. Most species prefer humidity levels above fifty percent, with sixty to seventy percent producing excellent growth. If your home’s air is dry, especially during winter, you may notice brown leaf edges or slower growth. There are several ways to increase humidity: Run a humidifier nearby. Group tropical plants together. Grow the plant inside a well-ventilated plant cabinet. Keep it away from heating vents and air conditioners. While many Alocasias can adapt to average household humidity, higher humidity usually produces healthier leaves and faster growth. Temperature Alocasias prefer warm temperatures year-round. Ideal temperatures range from about sixty-five to eighty-five degrees Fahrenheit. Avoid exposing them to temperatures below sixty degrees for extended periods, as cool conditions may slow growth or trigger dormancy in some species. Cold drafts from windows or air conditioning vents can also stress the plant. Choosing the Right Soil Alocasias need soil that holds moisture while still draining well. Heavy garden soil or dense potting mixes often stay wet too long and reduce airflow around the roots. A chunky, well-aerated mix works best. A good recipe includes potting soil or compost, pine bark, perlite, and a moisture-retaining ingredient like peat moss or coco coir. The goal is to create a mix that stays evenly moist while allowing oxygen to reach the roots. Fertilizing Because Alocasias grow quickly during the spring and summer, they benefit from regular feeding. Use a balanced liquid houseplant fertilizer according to the manufacturer’s directions during the active growing season. Reduce or stop fertilizing during winter if growth slows significantly. Too much fertilizer can cause salt buildup and damage the roots, so more is not always better. Dormancy One feature that surprises many new owners is dormancy. Some Alocasias naturally slow down or even lose most of their leaves during cooler months. This doesn’t necessarily mean the plant is dying. If your Alocasia enters dormancy, reduce watering while keeping the soil slightly moist, continue providing bright light, and wait patiently for new growth to emerge as temperatures and daylight increase. Many healthy plants return with vigorous new growth in spring. Repotting Alocasias generally appreciate being repotted every one to two years. Signs that it’s time include roots growing through drainage holes, water draining too quickly, or noticeably slower growth. Choose a pot only one or two inches larger than the current container. Moving into an oversized pot increases the amount of wet soil around the roots and raises the risk of root rot. Always use a pot with drainage holes. Common Problems Yellow Leaves One yellow leaf is not always a cause for concern. Older leaves naturally die as the plant produces new ones. However, multiple yellow leaves often indicate overwatering, poor drainage, or insufficient light. Brown Leaf Edges Brown edges usually result from low humidity, underwatering, inconsistent watering, or fertilizer buildup. Increasing humidity and maintaining more consistent watering often solves the problem. Drooping Leaves Drooping may occur when the soil becomes either too dry or too wet. Always check the soil before watering rather than assuming the plant needs more water. Slow Growth Slow growth is commonly caused by insufficient light, cool temperatures, or a lack of nutrients during the growing season. Common Pests Like many tropical houseplants, Alocasias can occasionally attract pests. Spider mites are especially common in dry indoor environments. They may also experience problems with thrips, aphids, or mealybugs. Inspect both the tops and undersides of leaves regularly, especially when introducing a new plant into your collection. Early treatment is much easier than controlling a large infestation. Popular Alocasia Varieties The Alocasia genus includes dozens of beautiful species and cultivars. Some of the most popular include: Alocasia Frydek, known for its velvety dark green leaves with bright white veins. Alocasia Silver Dragon, featuring heavily textured silver foliage. Alocasia Polly, a compact variety with dramatic arrow-shaped leaves. Alocasia Dragon Scale, prized for its thick, textured leaves resembling reptile scales. Alocasia Regal Shield, a large-growing variety with enormous dark green leaves. Each variety has its own appearance, but their care requirements

Tips

The Best Houseplants for Beginners: Easy Plants That Thrive Indoors

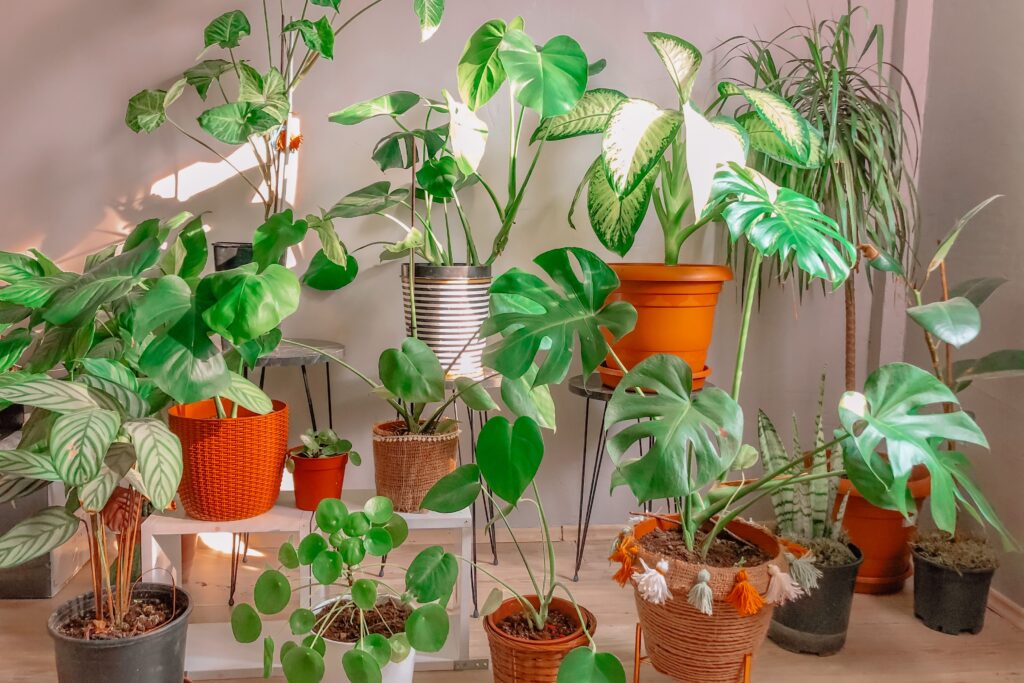
Care Guide The Best Houseplants for Beginners: Easy Plants That Thrive Indoors If you’re new to houseplants, it can feel overwhelming trying to decide where to start. Walk into a garden center and you’ll find hundreds of beautiful plants, each with different watering needs, lighting preferences, and care requirements. Some are incredibly forgiving, while others can be challenging even for experienced collectors. The good news is that you don’t need a green thumb to grow healthy houseplants. Many popular indoor plants are remarkably resilient and can tolerate the occasional missed watering, changes in lighting, and other beginner mistakes. Choosing an easy-care plant allows you to build confidence while learning the basics of watering, lighting, and fertilizing. Once you’ve successfully cared for a few beginner-friendly species, you’ll be much more prepared to expand your collection with more demanding plants. Golden Pothos Golden pothos is often considered one of the best beginner houseplants in the world, and for good reason. Its trailing vines grow quickly, the leaves are beautiful, and it adapts well to a wide range of indoor conditions. Golden pothos tolerates lower light better than many tropical plants, although brighter indirect light encourages faster growth and stronger variegation. This plant is also forgiving if you occasionally forget to water. While it prefers the soil to dry slightly between waterings, it usually recovers quickly if you notice drooping leaves and water it promptly. Golden pothos can be displayed on shelves, hanging baskets, or trained to climb a moss pole, making it one of the most versatile houseplants available. Snake Plant Snake plants have earned a reputation for being nearly indestructible. Their upright sword-like leaves store water, allowing them to tolerate periods of drought much better than many tropical plants. Snake plants grow well in bright indirect light but also adapt surprisingly well to lower-light environments. One of the most common mistakes with snake plants is watering too often. They prefer allowing the soil to dry thoroughly before receiving more water. For people who travel frequently or sometimes forget about their plants, snake plants are an excellent choice. ZZ Plant The ZZ plant is another favorite among beginners. Its glossy, dark green leaves remain attractive year-round, and its underground rhizomes store water, helping the plant survive occasional neglect. ZZ plants tolerate low light better than many indoor species, although they grow faster when placed in brighter indirect light. Because they grow relatively slowly, they don’t require frequent repotting or constant maintenance. If your goal is to own a beautiful plant that asks very little in return, the ZZ plant is difficult to beat. Heartleaf Philodendron Heartleaf philodendrons are popular because they combine beautiful trailing vines with very forgiving care requirements. Their heart-shaped leaves remain lush even in average household conditions, and they recover well from minor care mistakes. Like pothos, these plants appreciate bright indirect light but adapt to lower-light conditions surprisingly well. Their fast growth also makes them rewarding for beginners because new leaves appear regularly throughout the growing season. Monstera Deliciosa If you’re looking for a larger statement plant, Monstera deliciosa is an excellent beginner option. Although its dramatic split leaves make it appear exotic, Monstera is surprisingly easy to care for indoors. Young plants begin with simple heart-shaped leaves before gradually developing the famous fenestrations that make Monsteras so recognizable. Providing bright indirect light, a climbing support, and watering once the upper portion of the soil dries is usually enough to keep a Monstera thriving. As the plant matures, it becomes one of the most impressive focal points you can add to your home. Spider Plant Spider plants have remained popular for generations because they’re incredibly forgiving. They produce long arching leaves and eventually develop baby plants that hang from the parent plant like little spiders, giving the species its common name. Spider plants grow well in bright indirect light and appreciate watering once the soil begins drying. They’re also one of the easiest houseplants to propagate, making them especially rewarding for beginners interested in expanding their collection. Peace Lily Peace lilies are known for their elegant white flowers and glossy green foliage. One reason they’re popular among beginners is that they communicate very clearly when they need water. When thirsty, the leaves noticeably droop. After a thorough watering, the plant often perks back up within a few hours. Although this makes watering straightforward, it’s still best not to let the plant repeatedly wilt, as consistent stress can slow growth over time. Chinese Evergreen Chinese evergreens, also known as Aglaonema, are among the easiest tropical foliage plants to grow indoors. Many varieties feature striking patterns of silver, green, pink, or red, making them attractive even without flowers. They tolerate average indoor humidity well and generally adapt to lower-light conditions better than many colorful foliage plants. For anyone wanting a decorative houseplant without complicated care requirements, Aglaonema is an outstanding choice. What Makes a Plant Beginner Friendly? Easy houseplants usually share several characteristics. They tolerate occasional missed waterings without serious damage. They adapt to average indoor humidity. They grow well under typical household lighting. They recover quickly from minor mistakes. They also tend to resist pests and diseases better than more delicate species. Plants with these characteristics allow new plant owners to focus on learning basic care instead of constantly worrying about perfect conditions. Common Beginner Mistakes Even the easiest houseplants can struggle if basic care is ignored. The most common mistake is overwatering. Many new plant owners assume plants should receive water on a fixed schedule, but healthy watering depends on how quickly the soil dries rather than the calendar. Another mistake is placing plants in extremely dark rooms. While many beginner plants tolerate lower light, nearly all of them grow faster and healthier with bright, indirect sunlight. Using pots without drainage holes can also create problems because excess water becomes trapped around the roots. Finally, many beginners repot plants into containers that are far too large. Choosing a pot only slightly larger than the current root system

Tips

How to Choose the Right Plant Pot: A Complete Guide for Healthy Houseplants

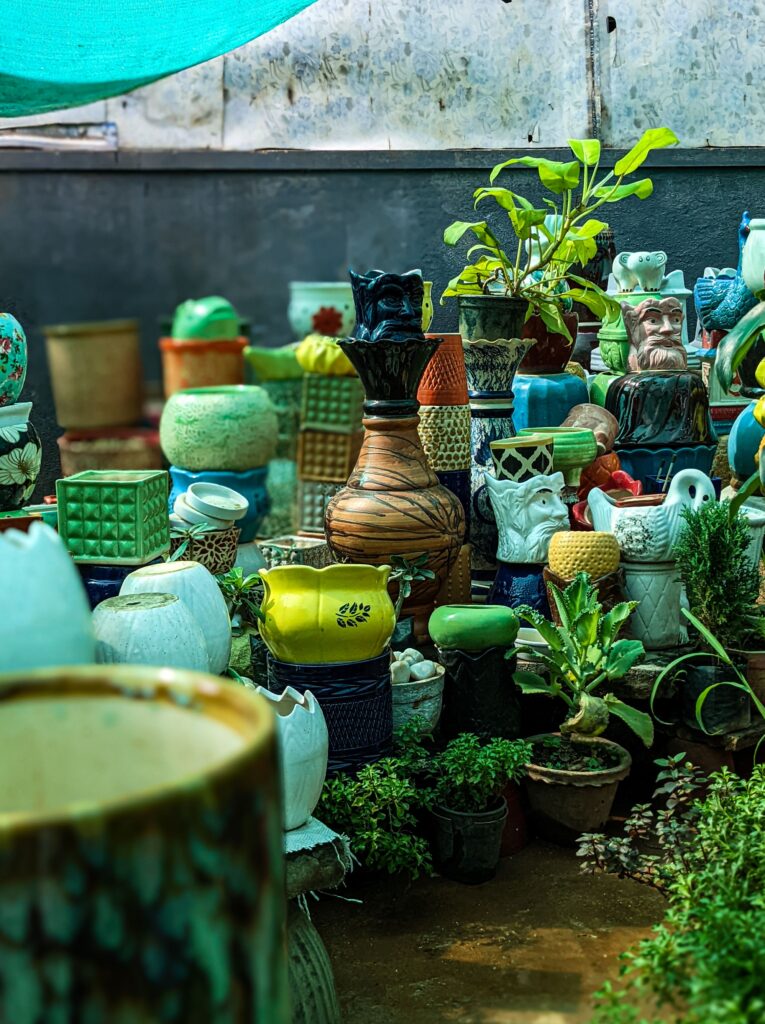
Care Guide How to Choose the Right Plant Pot: A Complete Guide for Healthy Houseplants Walk through any garden center and you’ll quickly realize that choosing a plant can be easier than choosing the pot it goes into. Decorative ceramic pots, terracotta planters, plastic nursery pots, self-watering containers, hanging baskets, and woven baskets all look appealing, but not every pot is the right choice for every plant. Many people focus entirely on appearance, choosing whichever container matches their home décor. While there’s nothing wrong with wanting your plants to look beautiful, the pot you choose has a major impact on how quickly the soil dries, how healthy the roots remain, and how often you’ll need to water. The good news is that selecting the right pot isn’t complicated once you understand a few basic principles. Drainage Is More Important Than Anything Else If there’s one feature every beginner should look for, it’s a drainage hole. Drainage holes allow excess water to escape after watering. Without one, water collects at the bottom of the container where it keeps the soil constantly wet. Over time, this lack of oxygen around the roots can lead to root rot, one of the most common causes of houseplant death. Even experienced growers rarely plant directly into containers without drainage holes. Instead, they often leave the plant in a nursery pot with drainage and place that pot inside a decorative cachepot. This gives them the appearance they want while still allowing excess water to drain properly. If you fall in love with a decorative pot that doesn’t have drainage, consider using it as an outer cover rather than planting directly into it. Bigger Isn’t Always Better One of the biggest mistakes new plant owners make is placing a small plant into an oversized pot. It seems logical. A bigger pot gives the roots more room to grow, so the plant should grow faster, right? Unfortunately, that’s usually not what happens. A large pot holds a much greater volume of soil. Since the plant’s root system is still small, it can’t use all that moisture very quickly. The result is soil that stays wet for much longer than necessary. Instead of encouraging faster growth, an oversized pot often increases the risk of root rot. As a general rule, choose a container that’s only about one to two inches wider than the current root ball when repotting most tropical houseplants. Plastic Pots Plastic nursery pots are popular for good reason. They’re lightweight, inexpensive, durable, and retain moisture longer than many other materials. Because plastic doesn’t absorb water, the soil dries primarily through evaporation and plant uptake. This makes plastic an excellent choice for plants that appreciate consistent moisture, such as peace lilies, calatheas, and many ferns. Plastic pots are also ideal if you tend to forget watering because they help the soil stay moist longer. Terracotta Pots Terracotta has been used for gardening for centuries. Unlike plastic, terracotta is porous. Water slowly evaporates through the clay itself, helping the soil dry more quickly. This makes terracotta an excellent option for plants that dislike constantly moist soil. Succulents, cacti, snake plants, jade plants, and many Hoyas often perform exceptionally well in terracotta because the extra airflow helps reduce the risk of overwatering. The tradeoff is that you’ll usually need to water more frequently. Ceramic Pots Ceramic containers are among the most attractive options for indoor plants. Glazed ceramic pots behave similarly to plastic because the glaze seals much of the surface. Unglazed ceramic behaves more like terracotta by allowing some moisture to escape. When shopping for ceramic planters, always check whether they include a drainage hole. Many decorative indoor pots do not. Self-Watering Pots Self-watering planters have become increasingly popular over the past several years. These containers store water in a reservoir beneath the soil. As the potting mix dries, moisture moves upward through a wick or specialized insert. They can work very well for moisture-loving plants and for people who travel frequently. However, they aren’t ideal for every species. Plants that prefer drying between waterings may remain too wet in these systems, especially if the reservoir is constantly refilled. Pot Material Changes Watering Frequency Many beginners wonder why one plant seems to need water every few days while another can go nearly two weeks. Sometimes the answer has nothing to do with the plant itself. Imagine two identical pothos plants growing in the same room under the same lighting. One sits in a plastic nursery pot. The other grows in terracotta. The terracotta container may dry significantly faster simply because water is evaporating through the clay. This is why it’s important to consider both the plant and the container when developing a watering routine. Decorative Cachepots One of the easiest ways to combine healthy plant care with attractive home décor is by using cachepots. A cachepot is simply a decorative container that holds another pot inside it. The actual plant remains in its plastic nursery pot with drainage holes. When it’s time to water, you simply remove the nursery pot, water thoroughly, allow excess water to drain away, and place it back into the decorative container. Many professional interior plant installers use this method because it looks clean while making maintenance much easier. Choosing a Pot for Different Types of Plants Different plants naturally have different preferences. Tropical foliage plants such as Monstera, Philodendron, Pothos, Syngonium, and Aglaonema generally perform well in plastic or glazed ceramic containers with excellent drainage. Succulents and cacti often benefit from terracotta because it encourages faster drying. Orchids usually prefer specialized orchid pots with extra ventilation around their roots. Large climbing plants such as Monstera deliciosa eventually benefit from heavier containers that help support the plant’s increasing weight. Don’t Forget the Saucer If your pot has drainage holes, you’ll also want something to catch the excess water. A matching saucer protects furniture and flooring while allowing water to drain freely. After watering, avoid letting your plant sit in standing water for long

Tips

Monstera Species Guide: How to Identify the Most Popular Monsteras

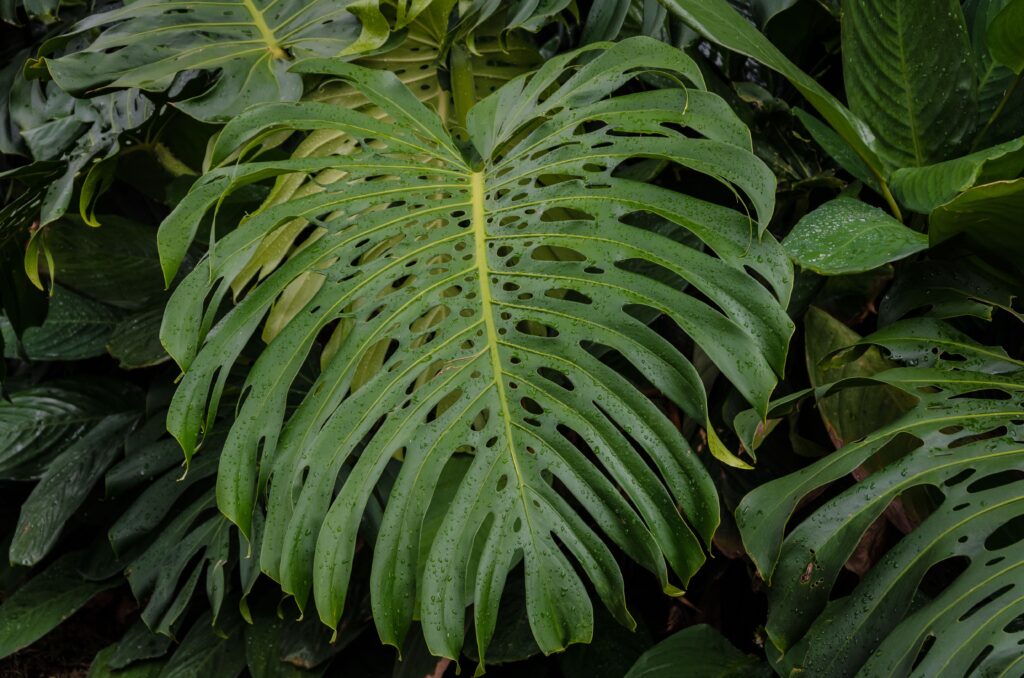
Care Guide Monstera Species Guide: How to Identify the Most Popular Monsteras Monsteras have become some of the most popular houseplants in the world, and it’s easy to understand why. Their dramatic leaves, fast growth, and tropical appearance make them a favorite among beginners and collectors alike. However, one thing that often confuses new plant owners is the number of different Monstera species and cultivars available. Walk into a plant store or browse online, and you might see names like Monstera deliciosa, Thai Constellation, Albo, Adansonii, Monkey Mask, Esqueleto, Dubia, or Peru. Some of these are completely different species, while others are simply cultivated varieties of the same plant. Learning the differences can help you choose the right plant for your home and avoid paying premium prices for plants that are being mislabeled. What Is a Monstera? Monsteras belong to a genus of tropical climbing plants native to Central and South America. In nature, they climb trees using aerial roots, eventually producing enormous leaves filled with dramatic holes and splits. Those holes, known as fenestrations, are one of the defining characteristics of mature Monsteras. Scientists believe these openings may help the plant withstand heavy rain, allow light to reach lower leaves, or reduce wind damage, although several theories still exist. Not every Monstera species develops the same type of fenestrations, which is one of the easiest ways to identify them. Monstera Deliciosa If someone simply says they own a Monstera, they’re usually talking about Monstera deliciosa. This is the classic “Swiss cheese plant” seen in homes, offices, and social media posts around the world. Young plants begin with solid, heart-shaped leaves. As the plant matures and receives plenty of light, support, and proper care, the leaves gradually develop deep splits that extend toward the center of the leaf. Mature specimens often develop additional interior holes between those splits, creating the iconic tropical appearance. Indoors, Monstera deliciosa can eventually reach eight feet or more when given a moss pole or other climbing support. In tropical climates, they can become absolutely enormous. One common misconception is that every deliciosa will immediately produce heavily split leaves. In reality, young plants often remain solid for quite some time before developing mature foliage. Thai Constellation One of the most recognizable Monsteras today is the Thai Constellation. Many beginners believe this is a separate species, but it isn’t. Thai Constellation is simply a variegated cultivar of Monstera deliciosa. The cream-colored marbling was created through tissue culture and is genetically stable. Unlike some other variegated Monsteras, every Thai Constellation carries this pattern throughout the plant. The amount of variegation varies from leaf to leaf, but the creamy speckles resemble stars scattered across the night sky, which inspired its name. Because variegated portions contain less chlorophyll, Thai Constellations generally grow more slowly than standard green Monstera deliciosa. They also appreciate bright indirect light to support healthy growth. If you compare a mature Thai Constellation to a mature green deliciosa, the overall leaf shape is almost identical. The primary difference is simply the beautiful cream variegation. Monstera Albo Another famous variegated Monstera is the Monstera Albo. Like Thai Constellation, this is not its own species. It is another variegated form of Monstera deliciosa. The biggest difference is the variegation pattern. Thai Constellation produces creamy speckles spread across the leaf. Albo variegation often appears as dramatic white sectors, large splashes, or even completely white half-moon leaves. Because Albo variegation is unstable, each new leaf is somewhat unpredictable. Some leaves may have only a little white while others may emerge almost completely variegated. This unpredictability is part of what makes Albo Monsteras so desirable among collectors. Monstera Adansonii Monstera adansonii is often confused with Monstera deliciosa because both develop holes in their leaves. However, they are very different species. Adansonii produces much smaller leaves with numerous oval holes throughout the leaf blade. Unlike deliciosa, the holes usually never reach the edge of the leaf. Instead, they remain enclosed within the leaf, creating a lace-like appearance. The plant also tends to vine much more aggressively and produces thinner stems. Given proper support, mature leaves can become surprisingly large, although they rarely resemble the broad leaves of deliciosa. Is Monkey Mask Different? This is probably one of the most common questions among plant buyers. The answer is both yes and no. In many garden centers, “Monkey Mask” is simply a marketing name used for Monstera adansonii. However, the name has also been applied to several different forms of adansonii over the years, creating confusion among collectors. Because of this, you should never assume “Monkey Mask” identifies a unique species. If you’re shopping at a local nursery, chances are the Monkey Mask label simply refers to Monstera adansonii. Monstera Esqueleto At first glance, Monstera esqueleto can look similar to adansonii. As the plant matures, though, the differences become obvious. Esqueleto develops much larger leaves with dramatically oversized fenestrations. Many of the holes become elongated and occupy a significant portion of the leaf surface, giving the foliage an almost skeletal appearance. This unique look explains the name “Esqueleto,” which means skeleton in Spanish. Collectors often seek this species because mature plants develop an appearance unlike almost any other Monstera. Monstera Peru Despite its name, Monstera Peru looks nothing like most Monsteras. Its leaves are thick, glossy, and heavily textured. Unlike deliciosa or adansonii, they develop almost no fenestrations. Instead, the raised ridges across the leaf surface give the plant a rugged appearance. Because the leaves are thicker and more rigid, many collectors appreciate Monstera Peru for its unusual texture rather than dramatic holes. Monstera Dubia Monstera dubia may be one of the strangest members of the genus. As a juvenile, it barely resembles a Monstera at all. Instead of hanging outward, the small leaves lie completely flat against a wooden board or tree trunk as the plant climbs upward. The silver-green patterning makes juvenile plants especially attractive. As the plant matures, the leaves transform dramatically into much larger foliage with entirely different characteristics. This

Tips

How Often Should I Water My House Plant?

Care Guide When Should I Water My Houseplants? Signs Your Plant Needs Water If you’ve ever searched online for how often to water a houseplant, you’ve probably seen answers like “once a week” or “every ten days.” While those recommendations may work in some situations, they can also be one of the biggest reasons new plant owners accidentally kill their plants. The truth is that there is no universal watering schedule. Every home is different, every plant is different, and even the same plant may need completely different amounts of water depending on the season. A pothos growing in a bright kitchen window during the middle of summer might need water twice as often as another pothos sitting in a dim office across town. Learning when your plant actually needs water is one of the most valuable skills you’ll develop as a plant owner. Once you understand what your plants are telling you, watering becomes much easier and your plants become healthier. Why Watering Is So Important Water does much more than simply keep a plant alive. It transports nutrients through the roots, allows cells to remain firm, supports photosynthesis, and helps regulate temperature throughout the plant. Without enough water, leaves begin to lose pressure, causing them to droop. If a plant stays dry for too long, growth slows, leaves may brown around the edges, and roots can eventually die. However, too much water is often an even bigger problem. Many people think overwatering means giving a plant too much water at one time. In reality, that’s usually not the issue. Plants actually appreciate a thorough watering. The real problem occurs when the soil never has an opportunity to dry enough for oxygen to reach the roots. Healthy roots need oxygen just as much as they need moisture. When soil stays constantly wet, the tiny air pockets inside the potting mix fill with water instead of air. Over time, roots begin to suffocate and become vulnerable to fungi that cause root rot. Once root rot begins, it can spread surprisingly quickly. This is why experienced plant growers often say they worry far more about watering too often than watering too much during a single watering session. Forget the Calendar One of the biggest mistakes beginners make is watering every Saturday or every Sunday simply because that’s “watering day.” Plants don’t own calendars. Instead, they respond to the conditions around them. Imagine two identical Monstera plants purchased on the same day. One lives near a large south-facing window where it receives bright indirect light for most of the day. The other sits across the room in lower light. Even though they’re genetically identical, the brighter plant will use more water because it’s actively growing faster. If both plants are watered on exactly the same schedule, one may thrive while the other slowly develops root problems. Now imagine winter arrives. The days become shorter. Your home’s heating system lowers humidity. Plant growth slows dramatically. The same watering schedule that worked perfectly during July may suddenly become far too frequent by January. Instead of asking yourself, “Has it been seven days?” ask yourself, “Does my plant actually need water today?” That simple change in thinking makes an enormous difference. Learn to Read the Soil Your soil tells you much more than your calendar ever will. The simplest method is to stick your finger into the potting mix about one to two inches deep. The very top of the soil dries quickly, so checking only the surface can be misleading. If the soil below the surface still feels cool and damp, your plant probably doesn’t need water yet. If it feels dry at that depth, many common tropical houseplants are ready for another watering. Some plants, such as peace lilies, ferns, and calatheas, generally prefer to stay slightly more moist. Others, including snake plants, ZZ plants, jade plants, and most cacti, prefer drying much more thoroughly before being watered again. As you gain experience, you’ll begin recognizing how different species behave instead of treating every plant the same. The Pot Weight Trick If you ask experienced collectors with hundreds of houseplants how they know when to water, many won’t even touch the soil. They simply pick up the pot. A freshly watered plant feels surprisingly heavy because the soil contains a large amount of water. As the plant uses that moisture and some evaporates, the container gradually becomes lighter. After lifting the same plant a few times over several weeks, your brain starts recognizing exactly what “needs water” feels like. This trick is especially useful if you own many plants because it allows you to move quickly through your collection without checking every pot individually. Light Changes Everything Light is one of the biggest factors influencing watering frequency. Plants growing under bright light photosynthesize more quickly. Faster photosynthesis means faster growth, stronger roots, and greater water use. Plants kept in darker conditions use less water because they’re growing more slowly. Many beginners unknowingly overwater low-light plants because they assume all houseplants should receive water every week. Instead, remember that lower light almost always means slower drying soil. Pot Material Matters Too Terracotta pots breathe. Water slowly evaporates through the clay itself, allowing soil to dry more quickly. Plastic pots retain moisture much longer. Ceramic pots vary depending on whether they’re glazed. If you’ve ever wondered why one of your plants dries twice as fast as another, the container may be part of the answer. Pot Size Makes a Difference Large pots hold significantly more moisture than small pots. A tiny four-inch nursery pot may dry within several days. A large twelve-inch decorative planter may stay moist for two weeks or longer. Using an oversized pot for a small plant can actually increase the risk of root rot because there is simply too much wet soil surrounding a relatively small root system. Choosing an appropriately sized pot helps the soil dry at a healthier rate. Seasonal Changes Plants behave very differently throughout the year.

Scroll to Top